-
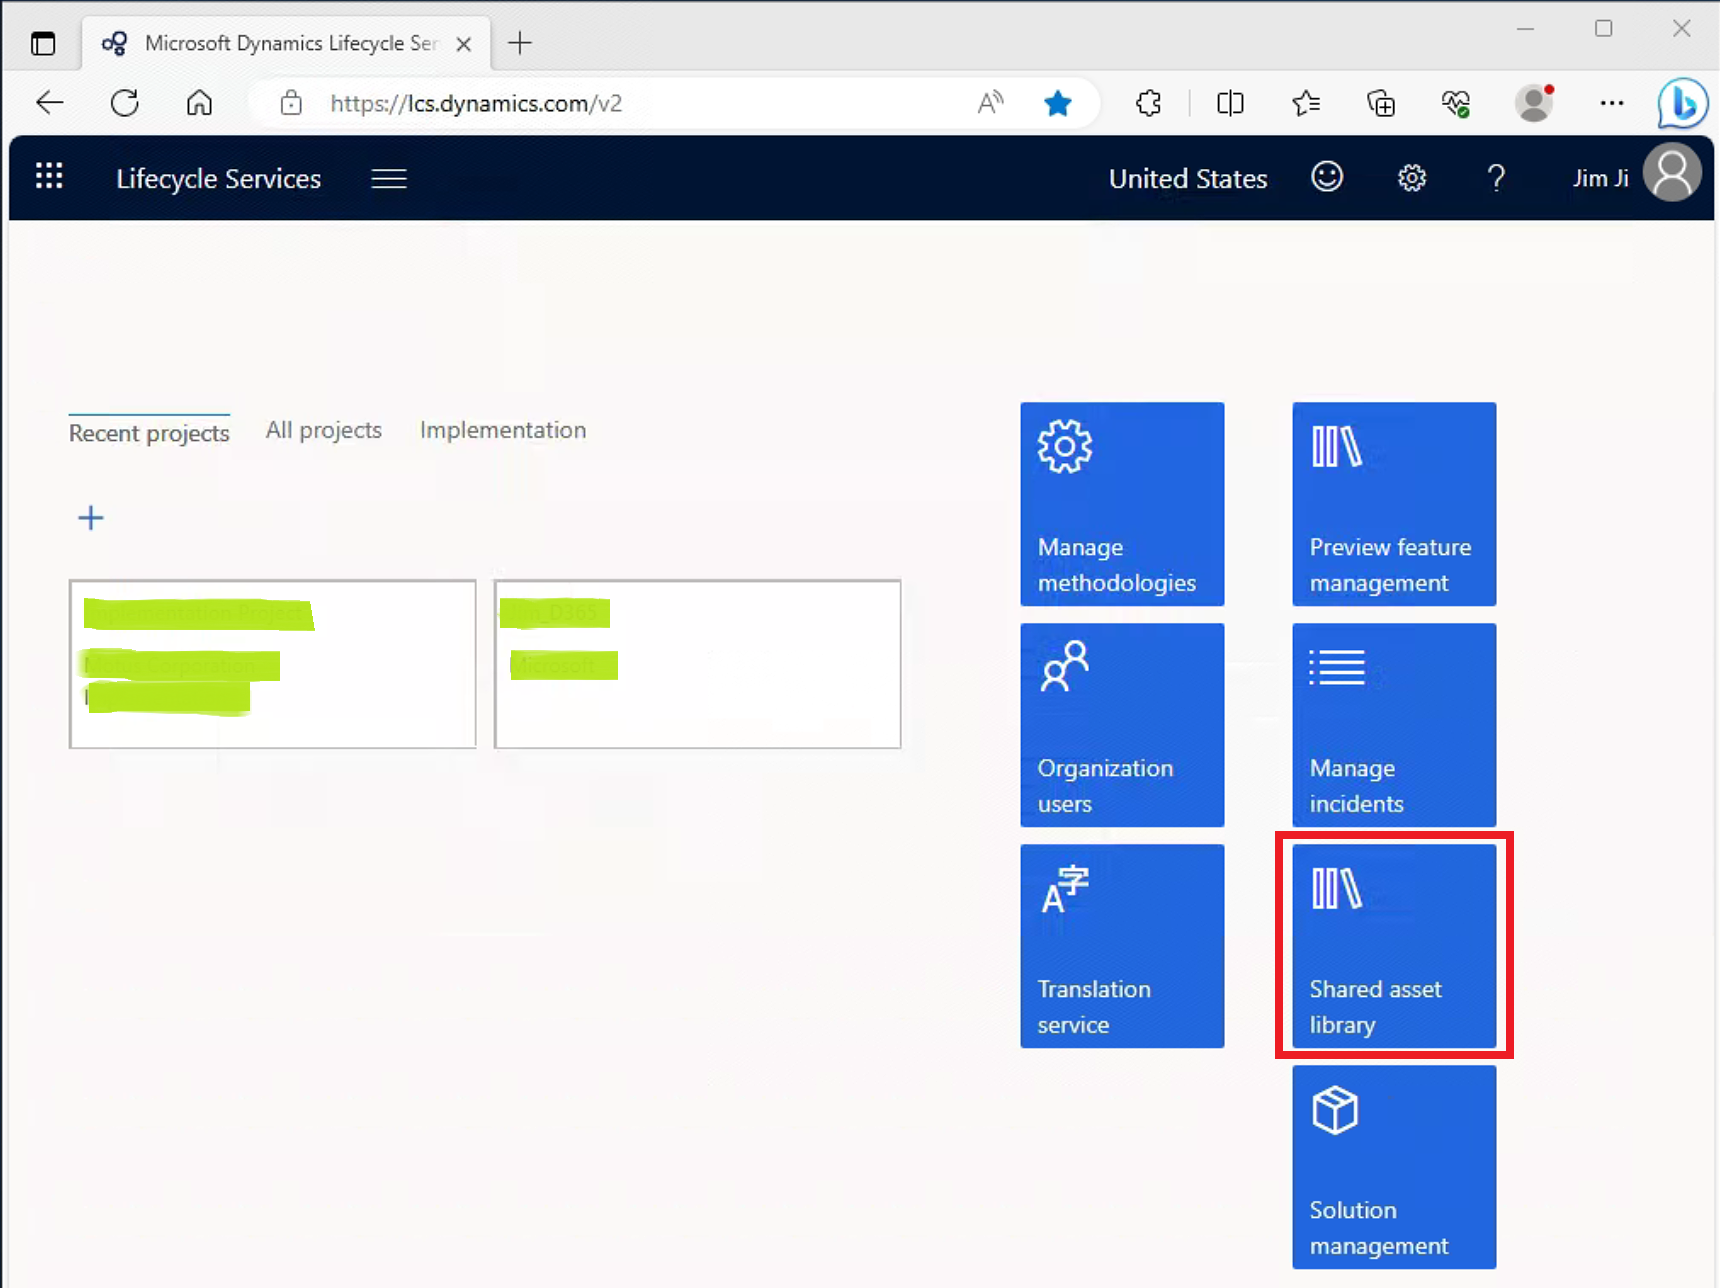
Sign in to Microsoft Lifecycle Services (LCS):
https://lcs.dynamics.com/v2 , Click ‘Shared Asset Library’.
-
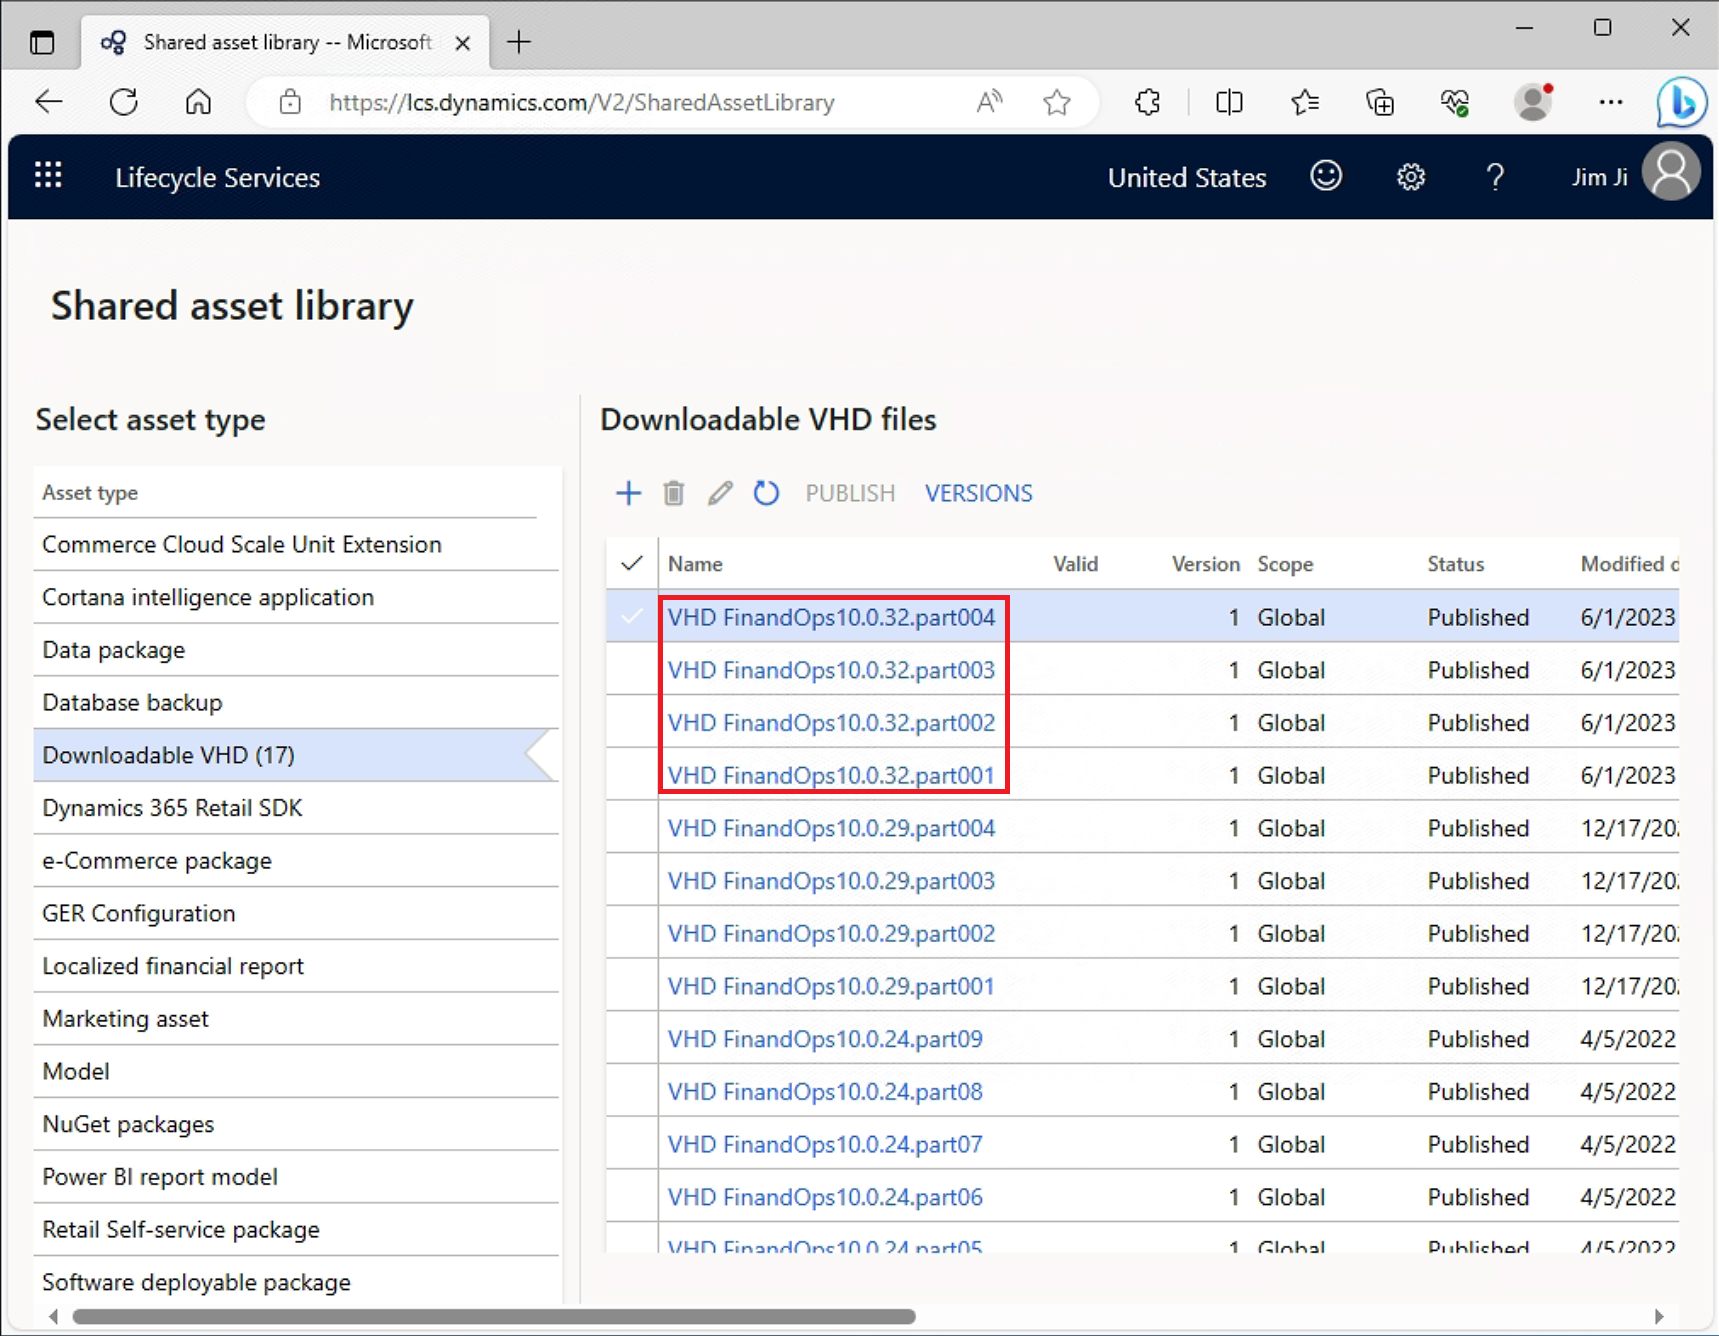
Click on ‘Downloadable VHD’. Download all the parts of the latest version on your local machine.
-
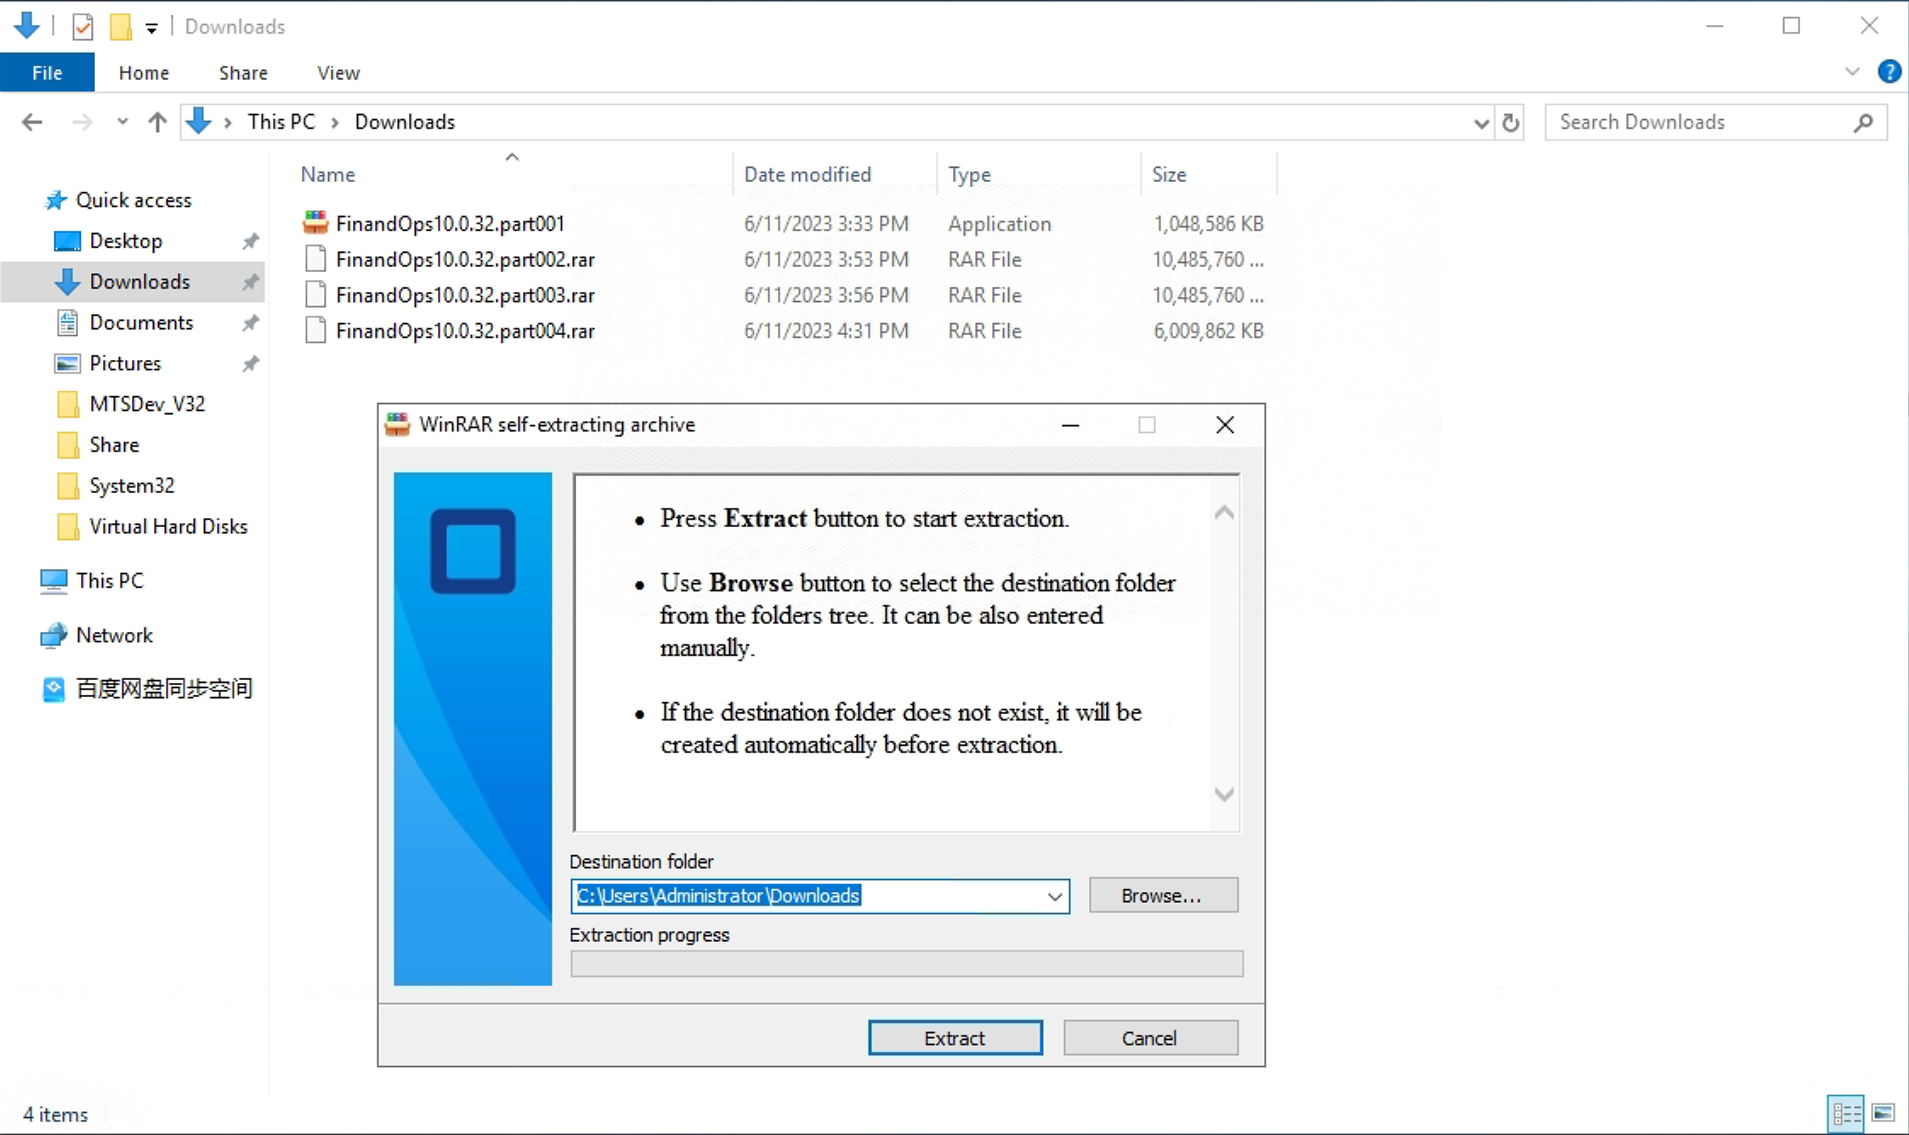
Double click and execute the ‘*.part001.exe’, Set the destination path where you want to extract the VHD.
-
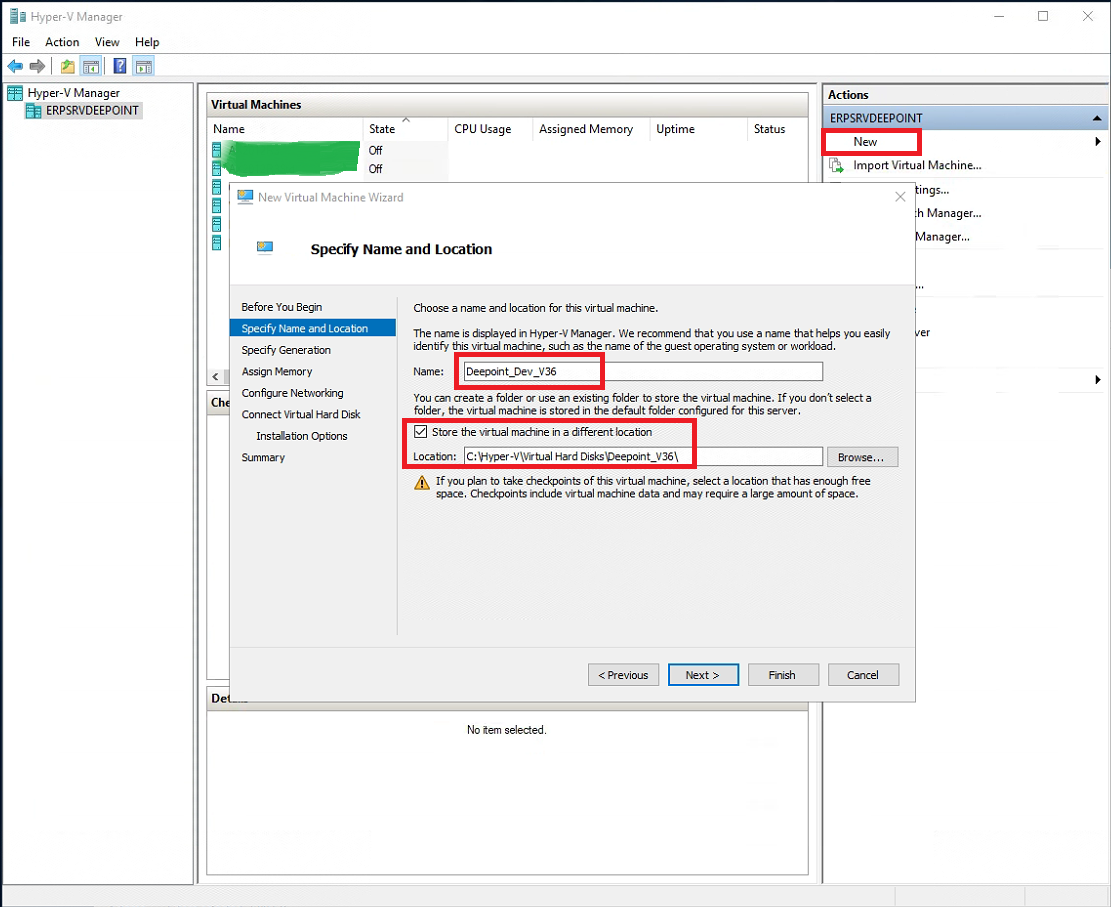
Open ‘Hyper-V Manager’, Click ‘New’ on the right-side action bar. After that, click ‘Virtual Machine’. Specify the name of the VM, and set the location of the VM. Click ‘Next’.
Select “Generation 1”, click ‘Next’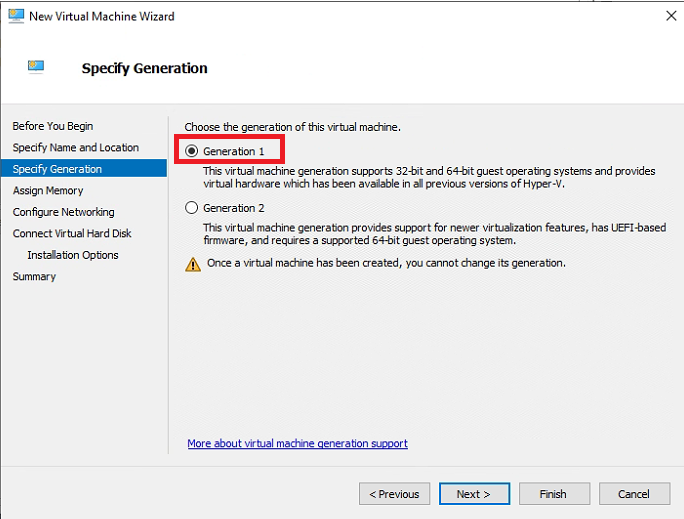
Allocate enough memory (64G) to the VM to ensure it runs smoothly, click ‘Next’
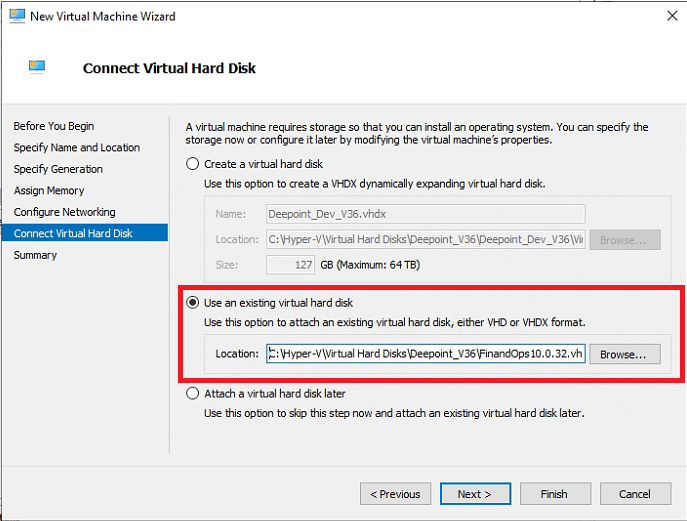
Select ‘Use an existing virtual hard disk’. Set the path of the extracted VHD file from previous step
Click ‘Finish’ to complete the VM importing.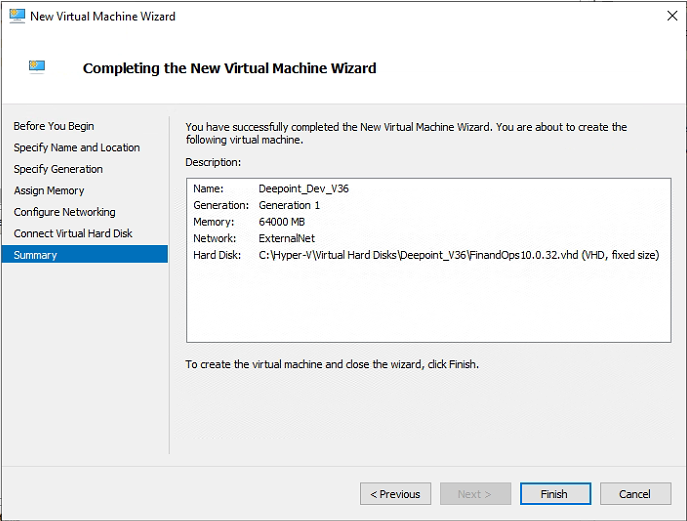
-
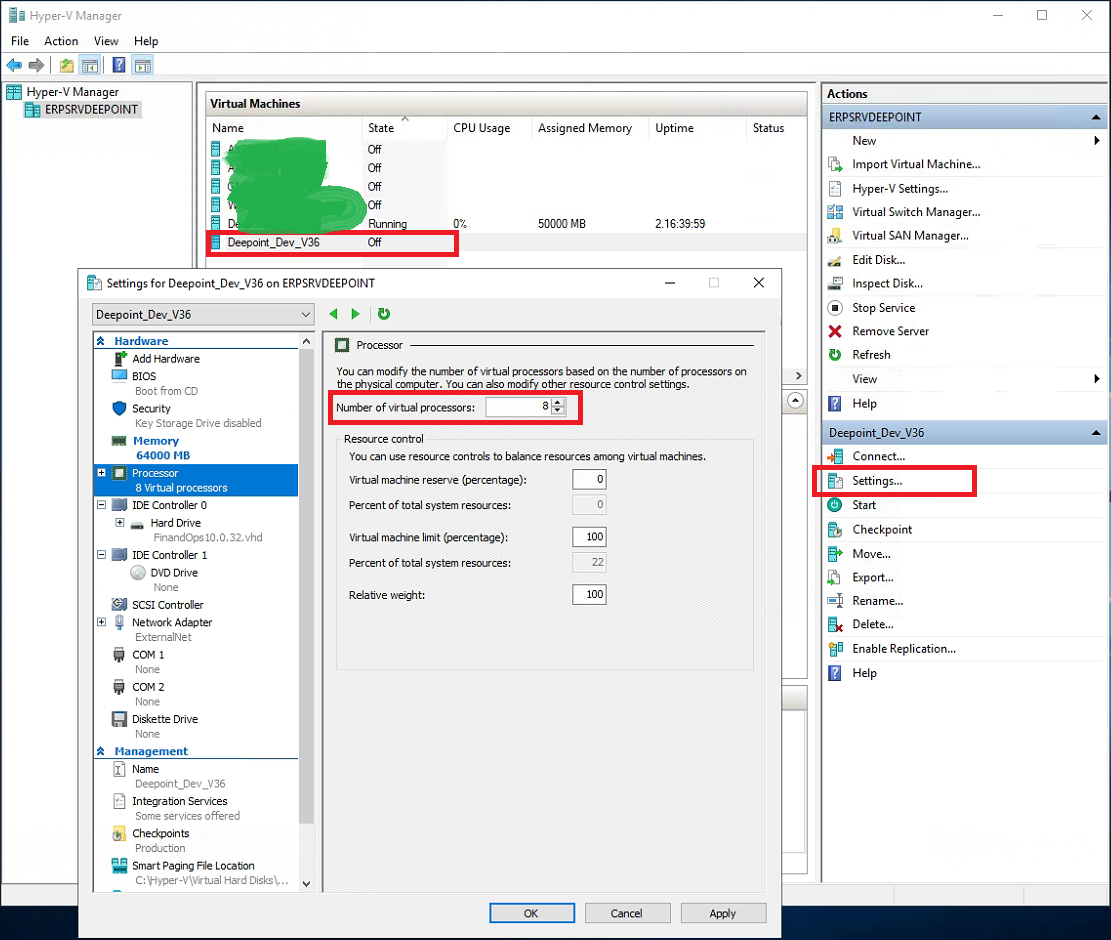
Go back to ‘Hyper-V Manager’, the new VM ‘Deepoint_Dev_V36’ is created, select it, and click ‘Settings’, click on the ‘Processor’ from the left bar, assign proper number of CPU to this VM
-
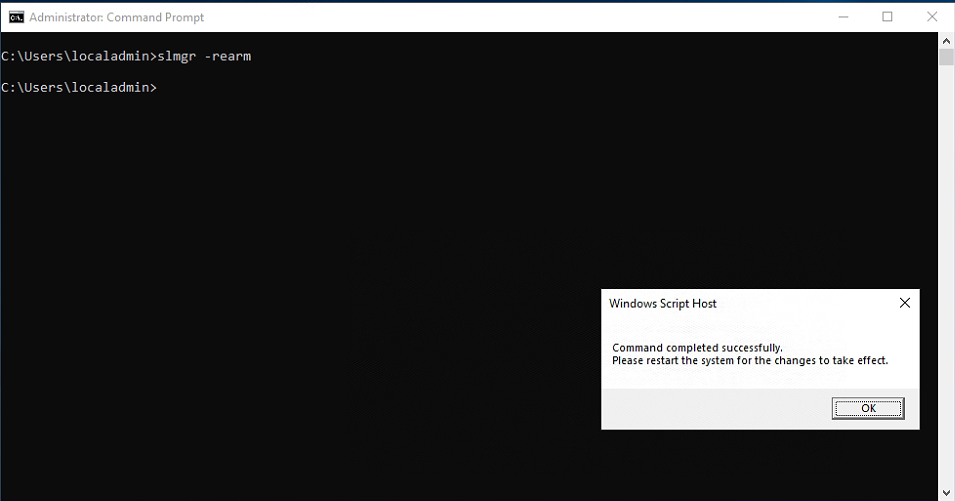
Connect to the newly created VM, the default password for the VM is “pass@word1”. Check whether the VM’s windows license is exppired or not. If windows license is expired, open the command prompt and run as ‘administrator’, To reset the evaluation period, type ‘slmgr –rearm’ in the command prompt and press Enter button.
-
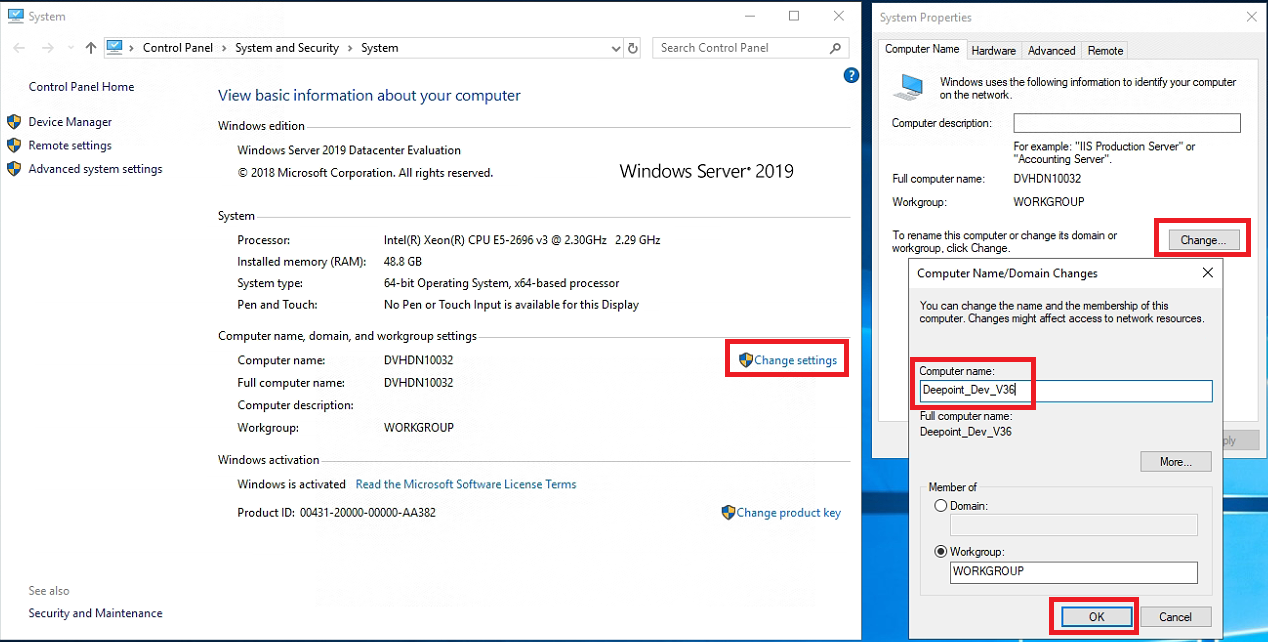
Change computer name is mandatory for DevOps management, restart the VM.
-
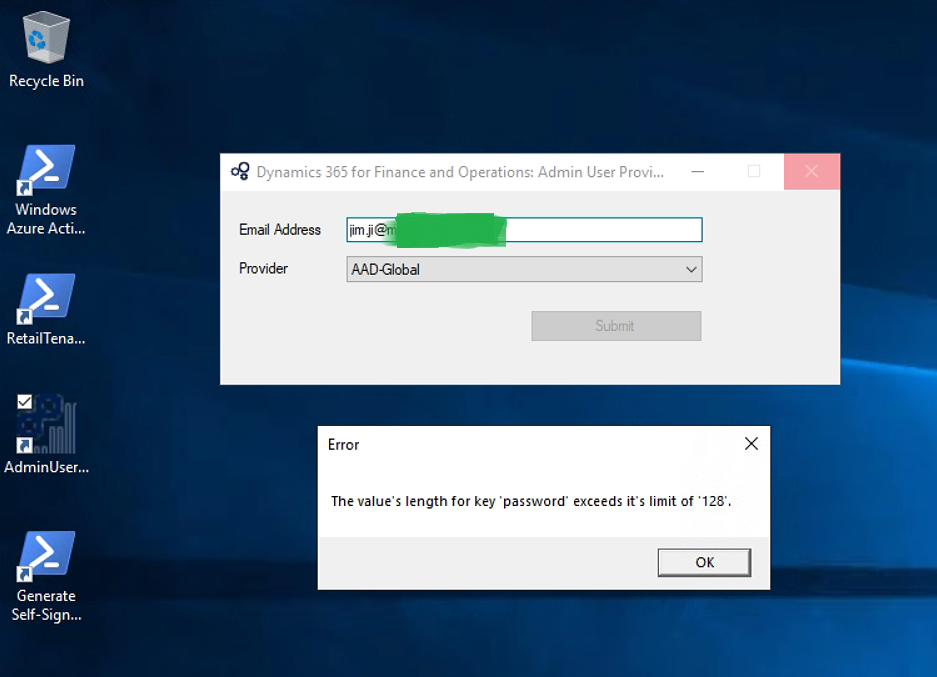
Click ‘AdminUserProvisioningTool’ on desktop and enter your corporate email address. You will get an error “The value’s length for key ‘password’ exceeds it’s limit of 128”.
-
To resolve the above error, Go to https://portal.azure.com > Active Directory > App Registration and register a new App. Provide the One-Box URL as the response address. Copy the AppID to your clipboard.
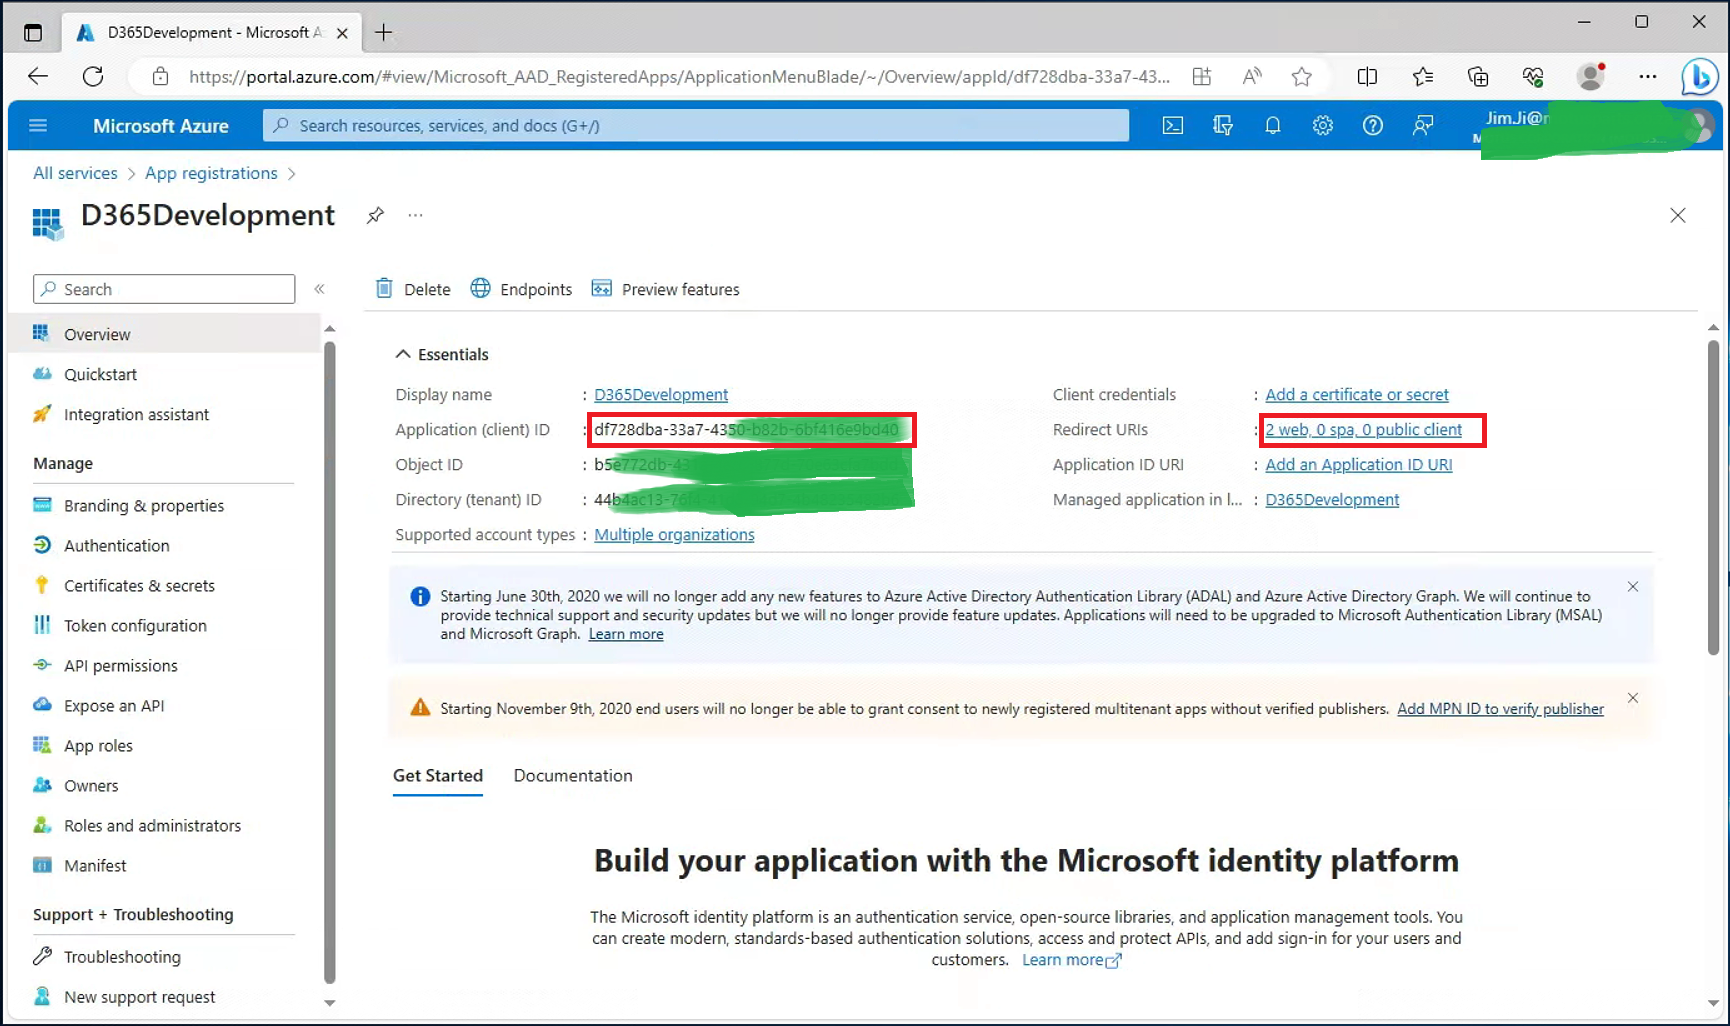
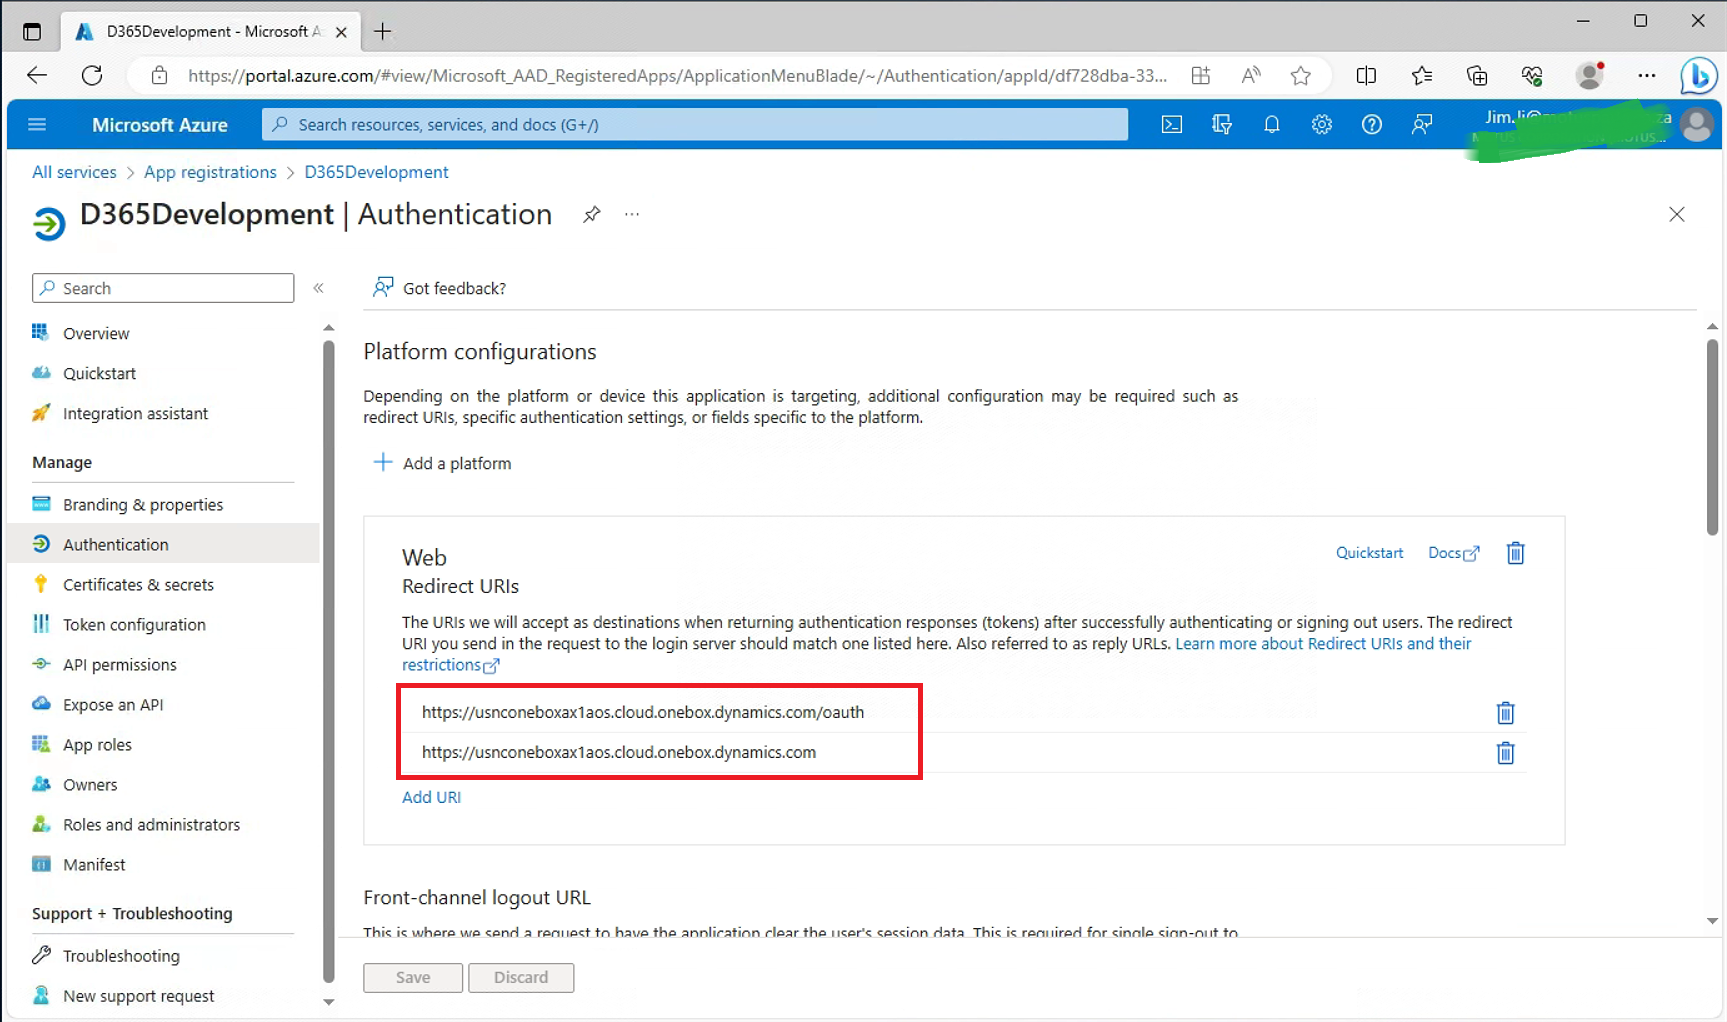
-
Execute the ‘Generate Self-Signed Certificates’ PowerShell script from the Desktop of the VM. Provide the AppID from the App Registration and press Enter. Type ‘N’ and press Enter.

-
Now again Click on the ‘AdminUserProvisioningTool’ and enter corporate email address.
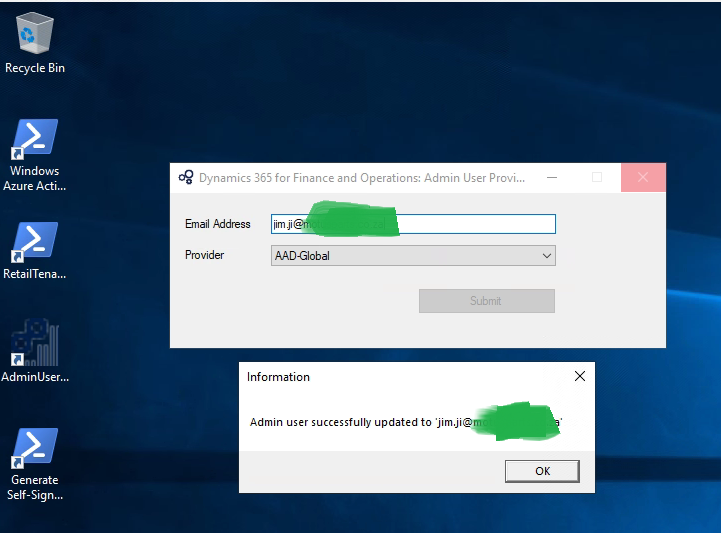
-
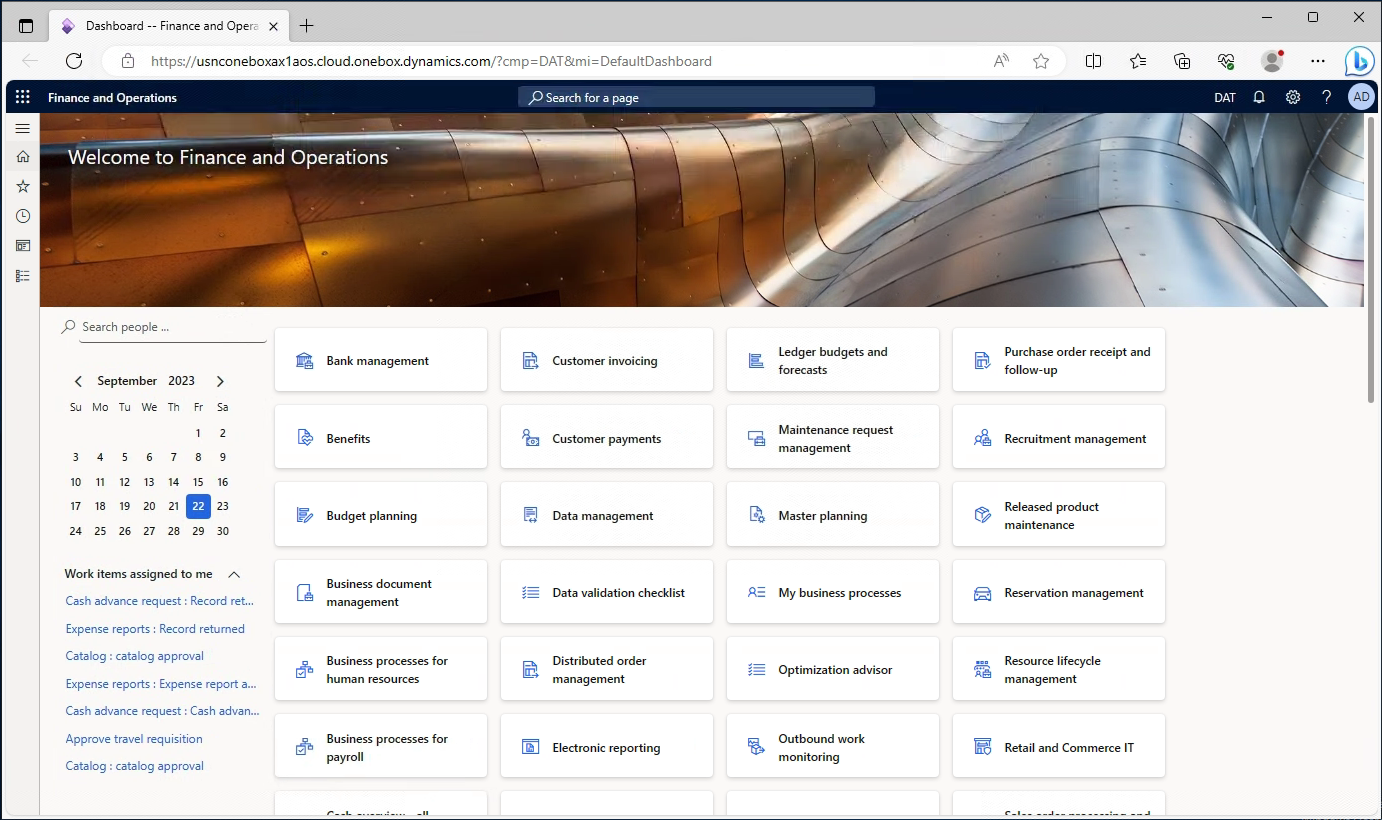
Now login to D365: https://usnconeboxax1aos.cloud.onebox.dynamics.com with the same email address which was set in ‘AdminUserProvisioningTool’.
